Qlik Sense
Qlik Sense
This page outlines the steps to connect Qlik Sense to Connect AI. You can use either Connect AI Virtual SQL Server API or the Connect AI OData endpoint to connect.
Prerequisites for Connecting via Virtual SQL Server API
Before you connect via Virtual SQL Server API, you must first do the following:
- Connect a data source to your Connect AI account. See Sources for more information.
- Generate a Personal Access Token (PAT) on the Settings page. Copy this down, as it acts as your password during authentication.
Connect to Connect AI via Virtual SQL Server API
To establish a connection from Qlik Sense to the Connect AI Virtual SQL Server API, follow these steps.
-
Log in to Qlik Sense.
-
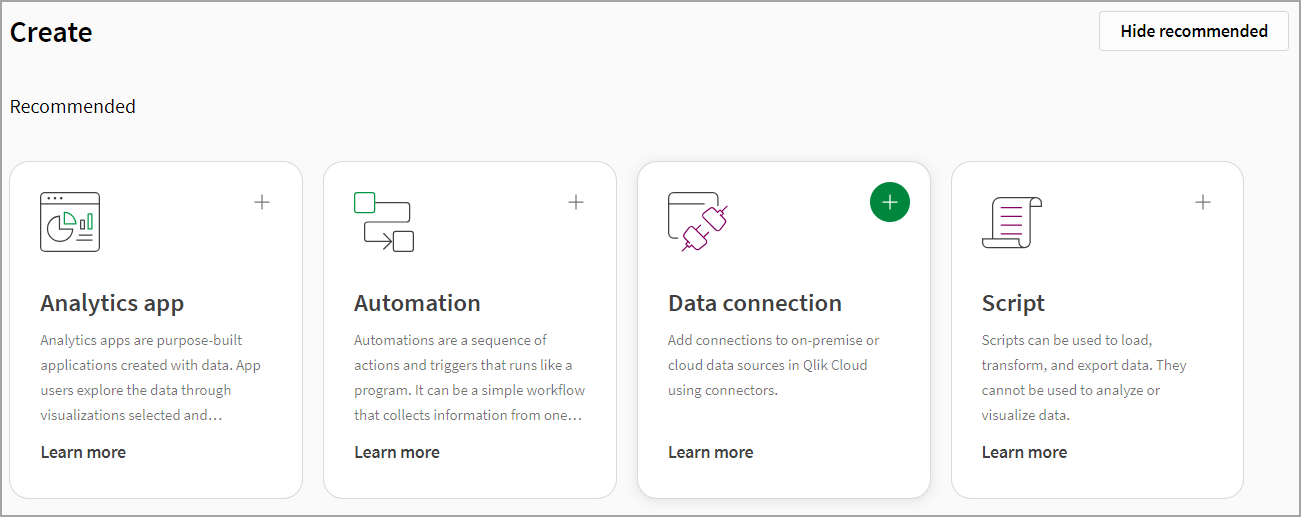
On the home dashboard, click Create > Data connection. Click + to create a new connection.
-
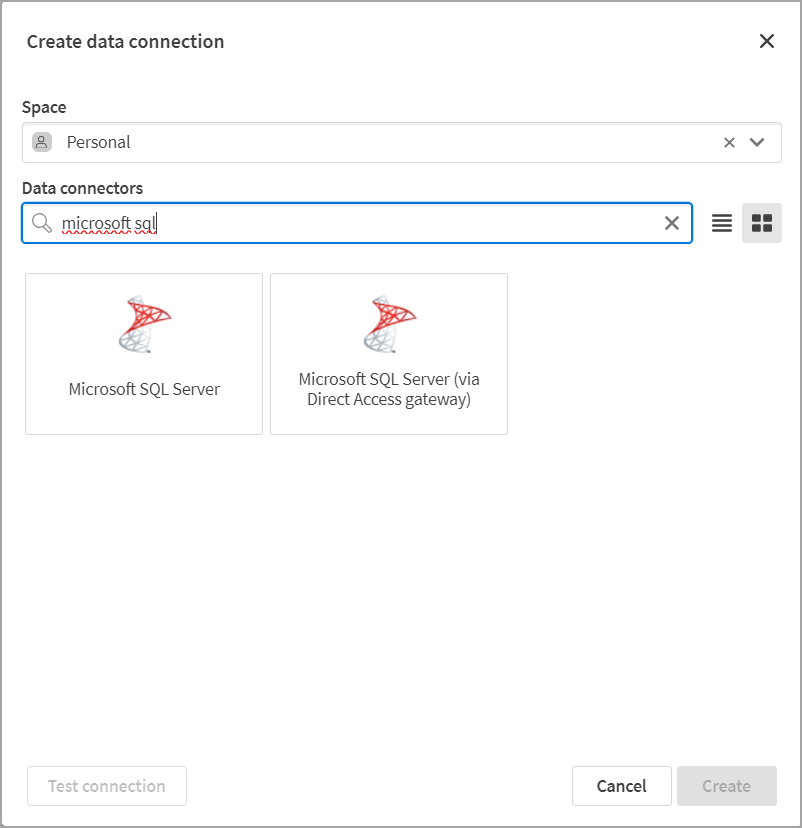
In the Create data connection dialog, enter Microsoft SQL Server in the search bar. Click the Microsoft SQL Server button that appears below.
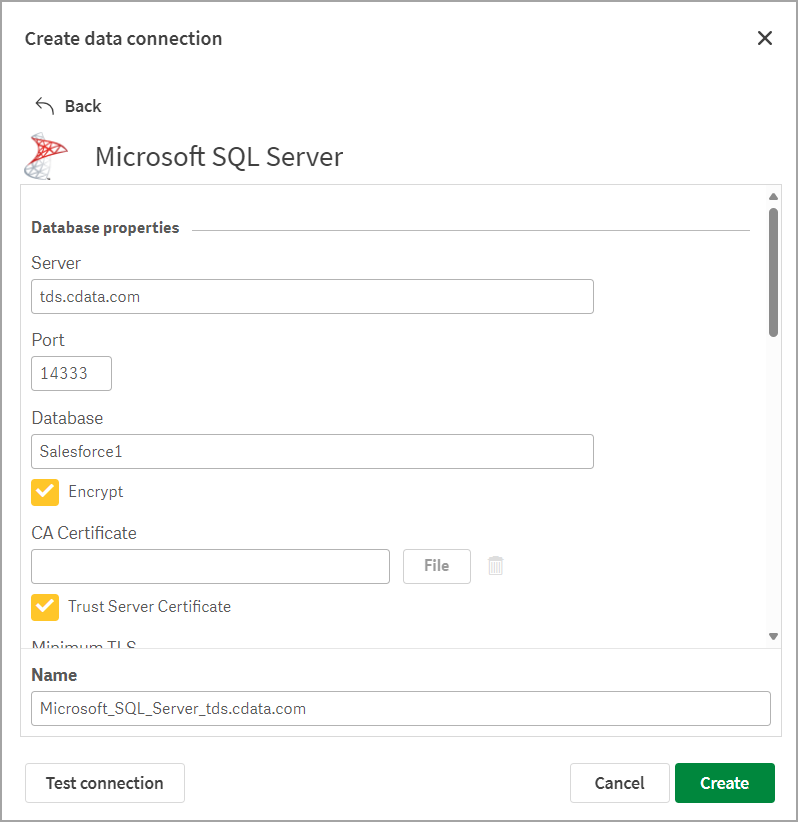
- Enter the connection settings.
- Database Properties
- Server—enter tds.cdata.com
- Port—enter 14333
- Database—enter the Connection Name of the Connect AI data source you want to connect to (for example, Salesforce1).
- Encrypt—check this box, but do not upload a certificate file.
- Trust Server Certificate—check this box.
- Minimum TLS—leave as 1.0.
- Authentication
- Use Trusted Connection—leave unchecked.
- Use NTLM—leave unchecked.
- Account properties
- User defined credentials—set this according to your needs.
- User name—enter your Connect AI username. This is displayed in the top-right corner of the Connect AI interface. For example, test@cdata.com.
- Password—enter the PAT you generated on the Settings page.
- Leave the settings below Account Properties blank and unchecked.
- Database Properties
-
Click Test connection to test your entered credentials. If you receive an error, check all fields and try again.
- Click Create to create the connection.
Your connection is now available for data analysis.
Prerequisites for Connecting via OData Endpoint
Before you connect to Connect AI via the OData endpoint, you must first do the following:
- Connect a data source to your Connect AI account. See Sources for more information.
- Create a Workspace. Later, you will use the OData Service URL on that page (https://cloud.cdata.com/api/odata/{workspace_name}) with the relevant workspace name to establish the connection.
- Generate a Personal Access Token (PAT) on the Settings page. Copy this down, as it acts as your password during authentication.
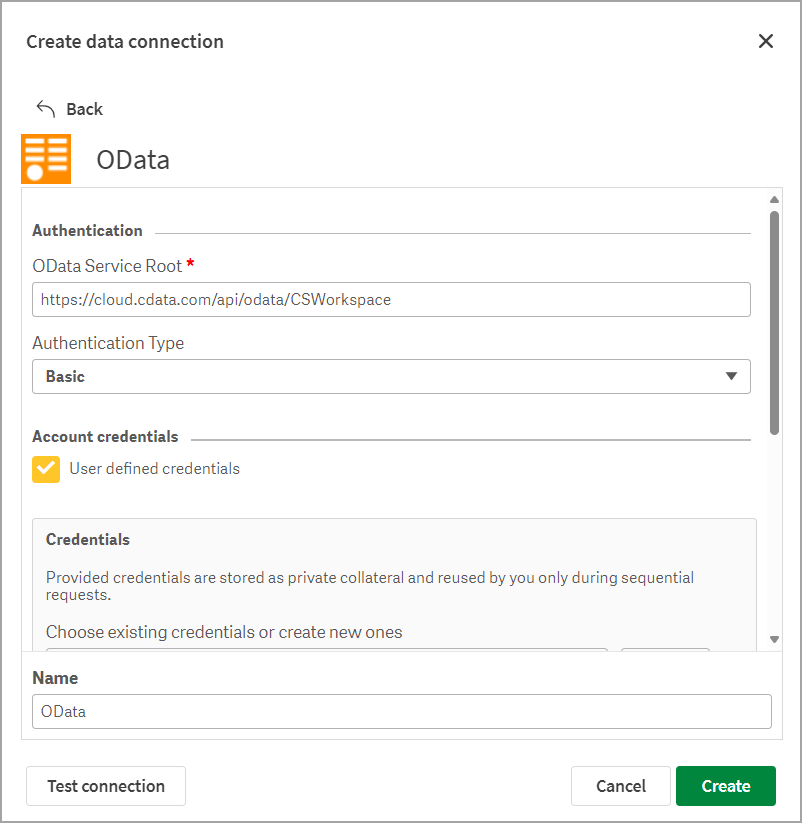
Connect to Connect AI via OData Endpoint
To connect to Connect AI using the OData protocol, follow these steps.
-
Log in to Qlik Sense.
-
On the home dashboard, click Create > Data connection. Click + to create a new connection.
-
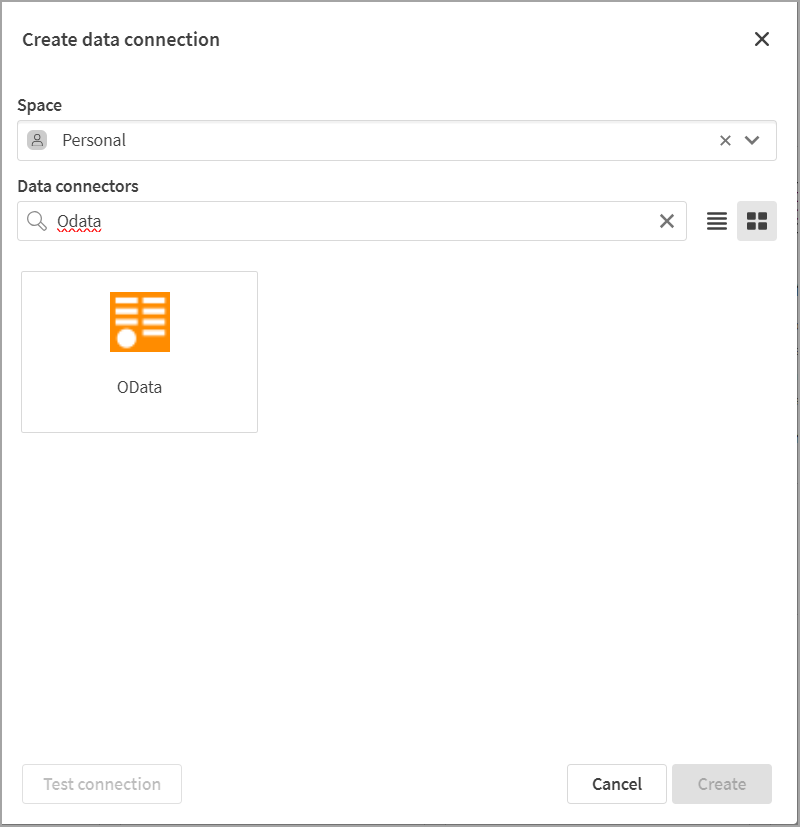
In the Create data connection dialog, enter OData in the search bar. Click the OData connector that appears below.
-
Enter the connection settings for OData.
- Authentication
- OData Service Root—https://cloud.cdata.com/api/odata/{workspace_name}
- Authentication Type—select Basic.
- Account credentials
- User defined credentials—set this according to your needs.
- Credentials name—enter a user-defined name for your credentials, if necessary.
- User name—enter your Connect AI username. This is displayed in the top-right corner of the Connect AI interface. For example, test@cdata.com.
- Password—enter the PAT you generated on the Settings page.
- Auth header—leave this blank.
- Authentication
-
Click Test connection to test your entered credentials. If you receive an error, check all fields and try again.
-
Click Create to create the connection.
Your connection is now available for data analysis.