Outsystems
Outsystems
This page outlines the steps to connect Outsystems to Connect AI.
Note: Before you can configure and use Outsystems with Connect AI, you must first connect a data source to your Connect AI account. See Sources for more information.
Prerequisites
Before you connect, you must first do the following:
- Connect a data source to your Connect AI account. See Sources for more information.
- Generate a Personal Access Token (PAT) on the Settings page. Copy this down, as it acts as your password during authentication.
Connect to Connect AI in Outsystems
-
Open Outsystems Studio.
-
Click the gear icon to open Environment Management.

-
Click Administration and select Database Connections.
-
Click New Database Connection.
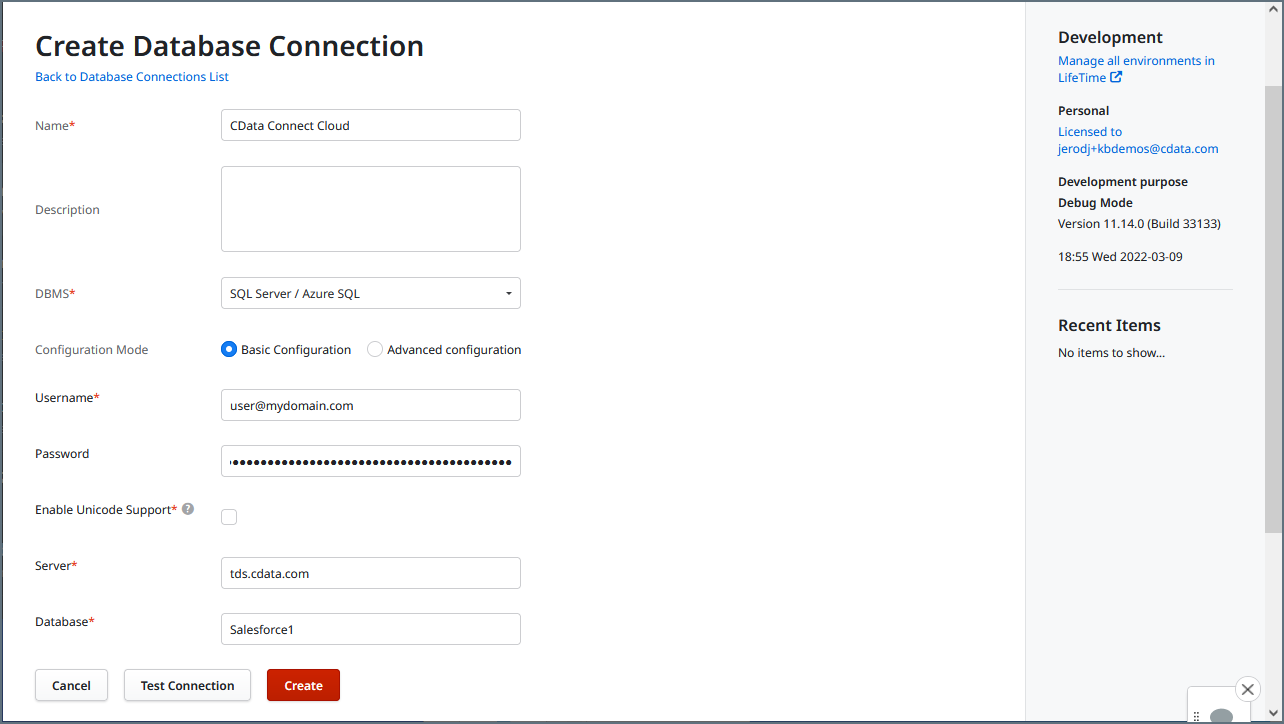
- Enter the following information to configure the database connection:
- Name—A name for the connection, such as Connect AI.
- DBMS—SQL Server/ Azure SQL.
- Username—The Connect AI user email used during preparation, e.g. user@mydomain.com.
- Password—The PAT generated for the Connect AI user above.
- Server—tds.cdata.com,14333.
- Schema—The name of your connection e.g. OData1.
-
Click Test Connection.
- Click Create to save the connection.
Map Tables or Views to Entities in an Extension Module
Once you create the dabatase connection, you can create an extension that maps tables or view to Outsystems entities. To do so, you must create an Entity in Outsystems Integration Studio.
-
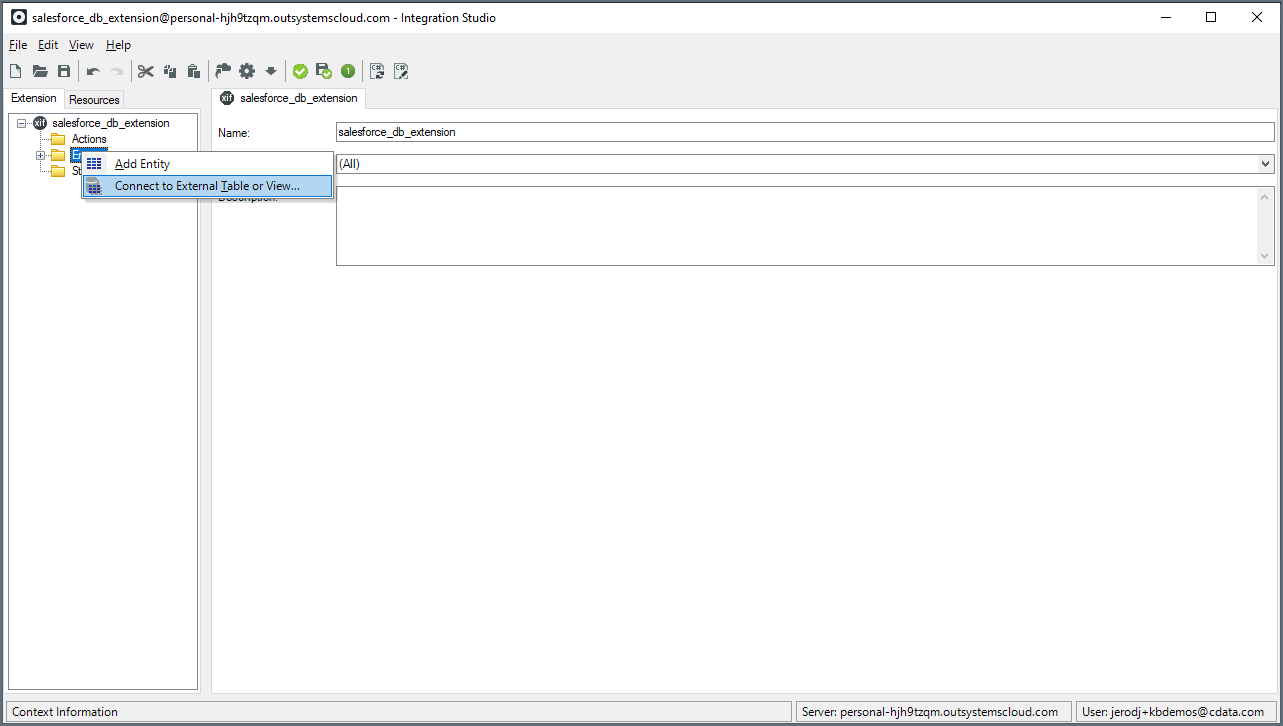
In Integration Studios, right click Entities in the extension tree and click Connect to External Table or View….
-
A wizard will appear. Follow its steps to select the tables and views to work with. Complete the wizard and return to the integration studio view.
-
Click 1-Click Publish. This opens a 1-Click Publish wizard. Once the process completes, click Configure.
-
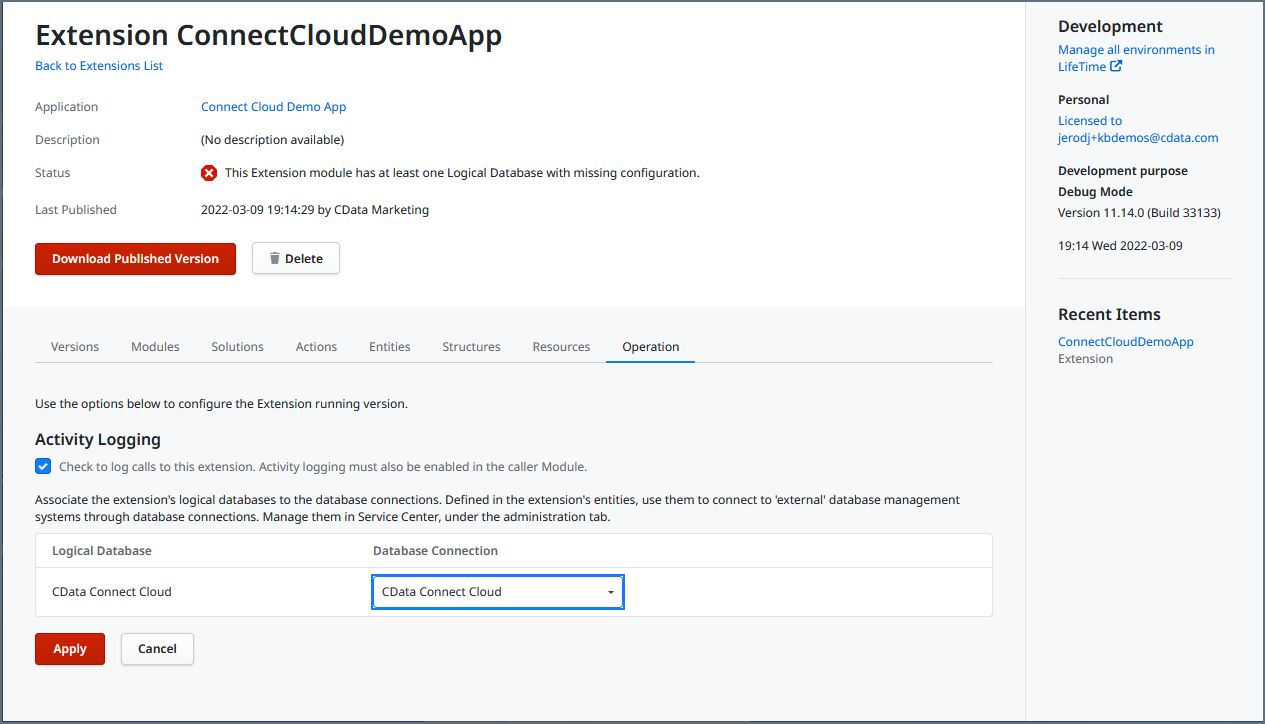
In the Service Center, associate the name of the Logical Database to the Database Connection the Extension Module will use and click Apply.
-
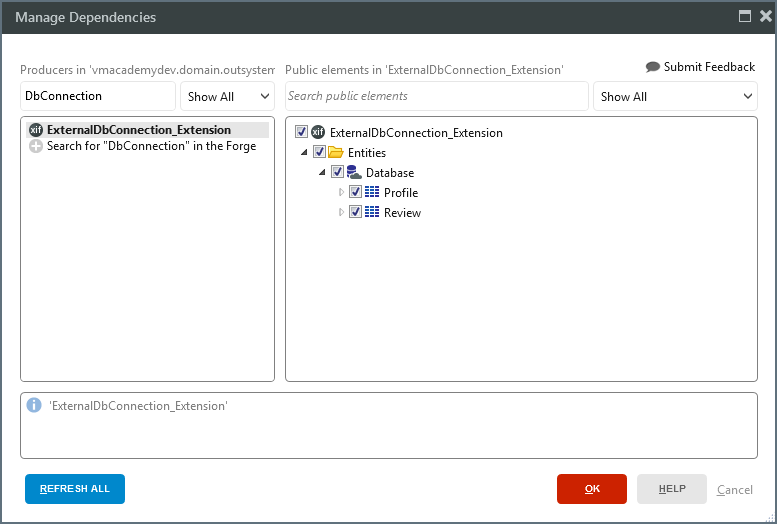
In the application, click Manage Dependencies….
-
Add the dependency to the Extension and select the Tables and Views to map to Entities to use in the application. Click OK.
You can now work with your data as if it was a standard Outsystems Entity.