Caching
Caching
Caching allows you to fetch cached data from a database instead of retrieving live data. This can improve performance of data connections, since some drivers can be slow retrieving live data.
With the Connect AI caching feature, users select tables to be cached, or saved to a database. Connect AI then fetches data for the selected tables on a scheduled basis, ensuring swift and reliable access to data whenever you need it.
Note that when you enable caching of data, Connect AI runs database queries against the cached data, not the live data.
The Jobs page displays a list of jobs to run, including caching jobs.
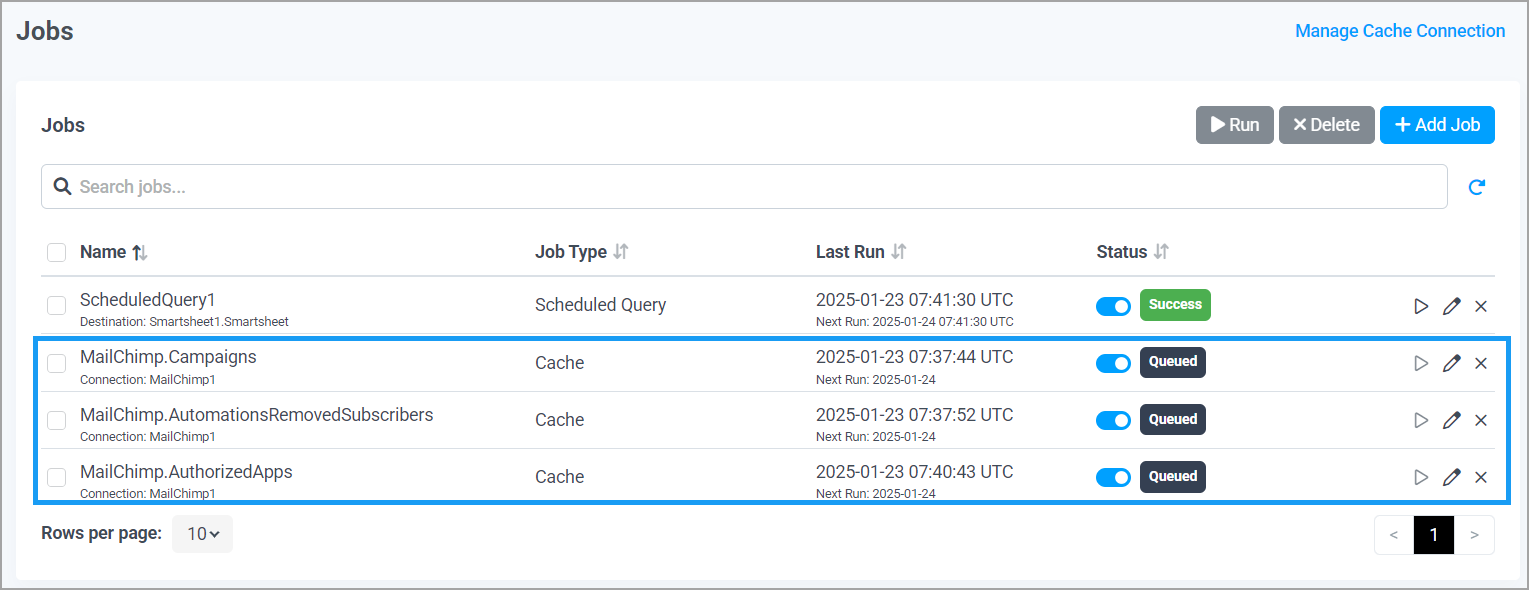
For each job, the Jobs page displays the full connection and table information, the job type, the last time the job was run, and the status of the job. You can select multiple jobs to run immediately by selecting the jobs and clicking Run at the top of the page. You can also delete multiple jobs by selecting them and clicking Delete at the top of the page. Note that when you delete jobs, Connect AI deletes the associated cached data.
The Jobs page also allows you to disable a particular caching job, if you want to pause the scheduled job but not delete it. Use the toggle switch in the Status column to enable or disable a job. You cannot run a job manually as long as it is disabled. When a caching job is disabled, any queries of that data will use the live data source.
Note: Caching is not available for relational databases.
Incremental Updates
The Connect AI caching feature allows for incremental updates, improving performance. When you create a caching job, Connect AI tries to find date or date+time columns in the database that show which rows are new or have changed since the last run. Connect AI can then run the caching job for those rows only. Otherwise, Connect AI runs a full update.
Configure Caching
Before you can use the caching feature, you need to configure a PostgreSQL database for your cached data.
To add a PostgreSQL connection for your cached data:
-
Click Setup Cache Connection. The Add PostgreSQL Connection page appears.
-
Set up authentication for your PostgreSQL connection. See PostgreSQL for detailed instructions.
-
Click Save & Test to save your connection. You can now cache data to the PostgreSQL database.
You can edit your PostgreSQL connection at any time by clicking Manage Cache Connection from the main Jobs page. Note that modifying your connection results in the clearing of data already in the cache.
Add a Caching Job
To add a new caching job, complete the following steps:
-
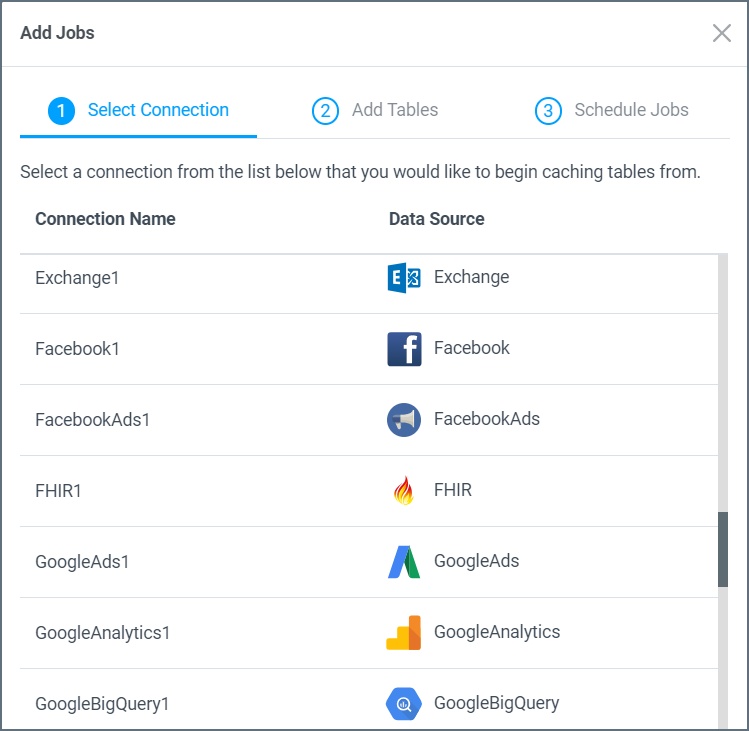
On the Jobs page, click Add Job > Cache Job. This action displays the Add Jobs dialog. There are three steps to adding a job: Select Connection, Add Tables, and Schedule Jobs . You can return to any of the previous steps by clicking the step in the header or by clicking Back.
-
Select a connection from the list of your connections in the dialog (Step 1), and then click Next.
-
Select the tables from your connection that you want to add to the job (Step 2).
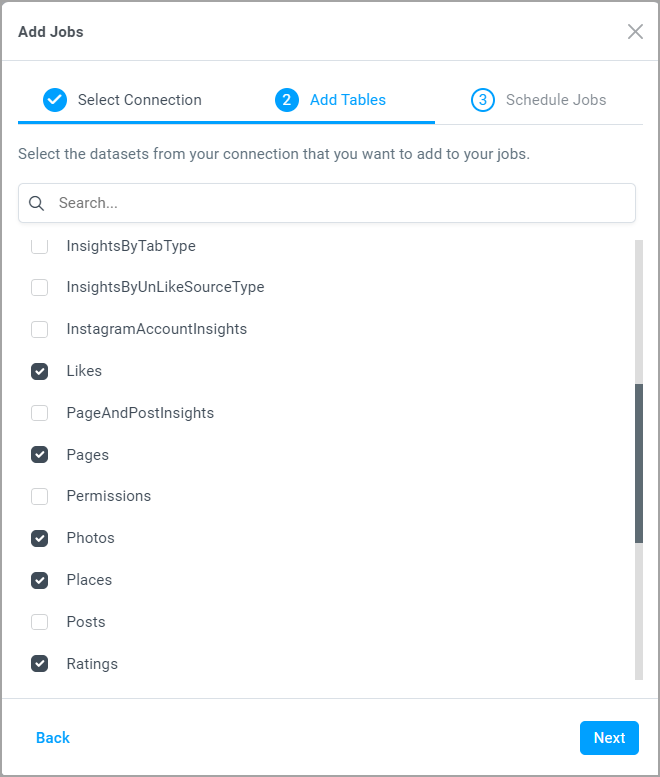
Connect AI displays the total number of datasets selected. Then click Next.
-
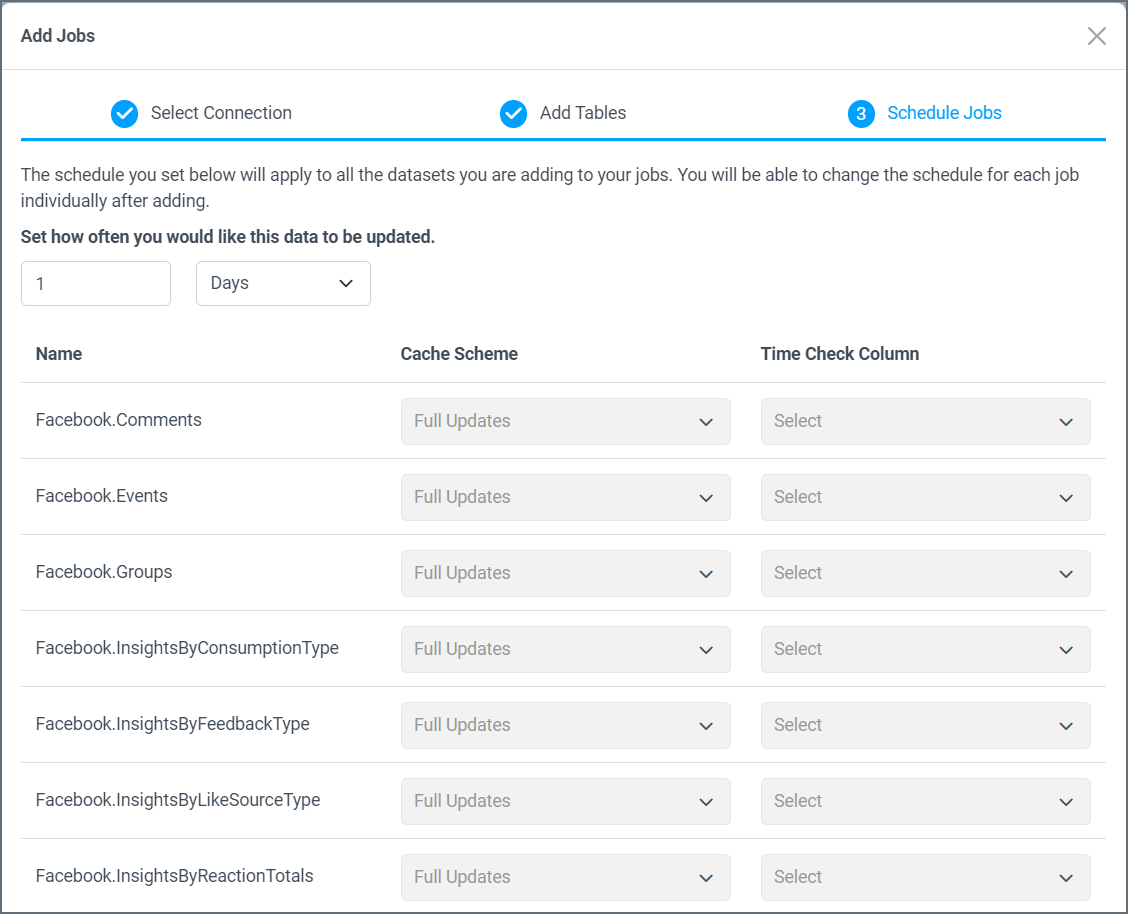
Select how often you want the data to be updated, in increments of hours, days, weeks, or months (Step 3).
-
Select a Cache Scheme (full or incremental) and Time Check.
Time Check Column is for incremental updates only. Choose a column in your table that Connect AI can use to determine which rows are new or have changed since the last run. This is typically a date or date+time column.
Note: If your data does not contain a time check column, Connect AI performs full updates only.
-
When you are satisfied with the job you added, click Confirm to save the job. Otherwise, click Back or click one of the previous steps in the header to make changes.
Your caching job now appears in the Jobs queue. Each table you selected for a given data connection is saved in the queue as a separate job.
Edit a Caching Job
You can modify or delete a job at any time by clicking the edit or delete icons in the list. You can also run a job manually at any time by clicking Run Now.

In the Edit Job page, you can do the following:
-
Change the caching scheme, such as changing full updates to incremental updates.
-
View the run history and status, making sure the job was successful.
-
Change the log verbosity.
-
Run a single job manually. You can run multiple jobs in the main Jobs page.
-
Turn off caching. Note that if you turn off caching, queries go to the live data source until you turn caching back on.
-
Refresh the cache. Refreshing the cache deletes all previously stored data and can take some time to complete.
-
Delete the job. This deletes all the cached data in your database. You can delete multiple jobs in the main Jobs page.