Excel
Excel
このページは、Excel デスクトップ版およびExcel Web 版を含む、Excel 用のCData Connect Spreadsheets アドインをインストールおよび設定する手順の概要を説明します。インストールが完了すると、Excel はCData Connect Spreadsheets アカウントに接続されたデータソースからデータを取得できます。
Note:CData Connect Spreadsheets でExcel を設定し、使用する前にデータソースをCData Connect Spreadsheets アカウントに接続する必要があります。詳しくは、接続の設定を参照してください。
Connect AI ユーザーのみ:また、ワークスペースとDerived View をインポートすることもできます。ワークスペースを作成するには、Workspaces の指示に従ってください。Derived view を作成するには(管理者のみ)、Derived View の作成の指示に従ってください。
アドインのインストール
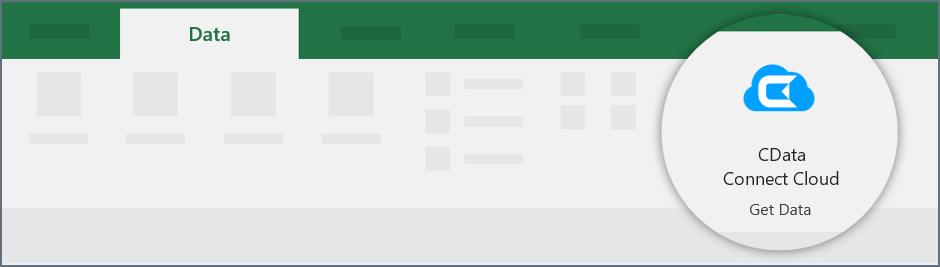
Excel アドインはCData Connect Spreadsheets のダッシュボートもしくはExcel からインストールできます。
CData Connect Spreadsheets ダッシュボードから
-
ダッシュボードのIntegrations ページを開きます。
-
Excel タイルを見つけるか、検索バーを使用します。
-
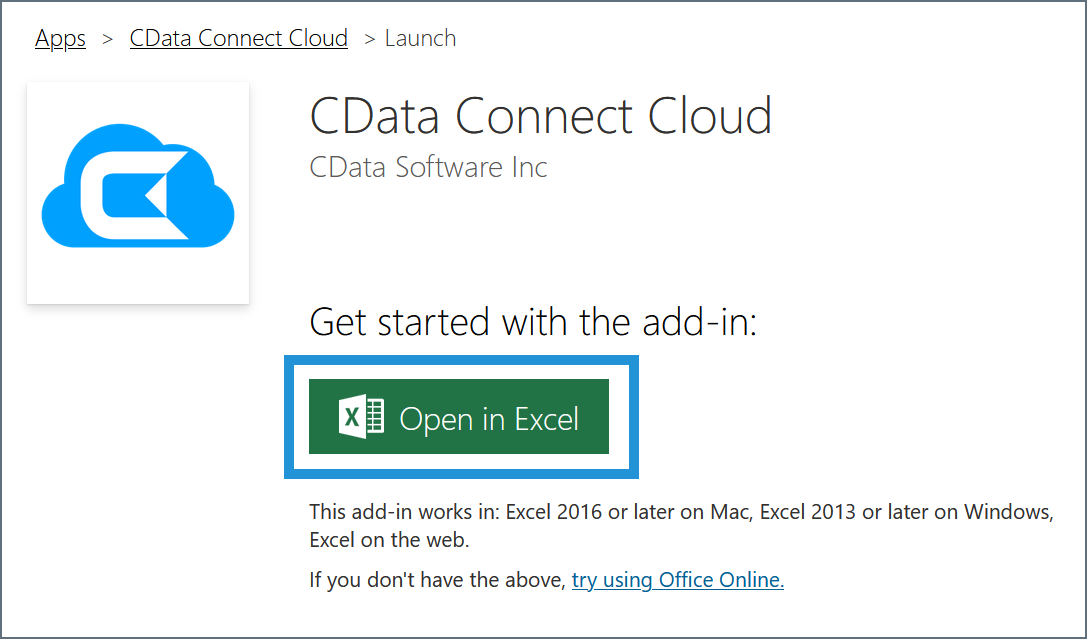
Get Started をクリックします。Excel のアドインページが開きます。
-
今すぐ入手するをクリックします。プロンプト画面が表示された場合はMicrosoft アカウントでサインインします。
-
開始ページで、(Excel Web 版用)Office Online を使用してみてくださいをクリックします。
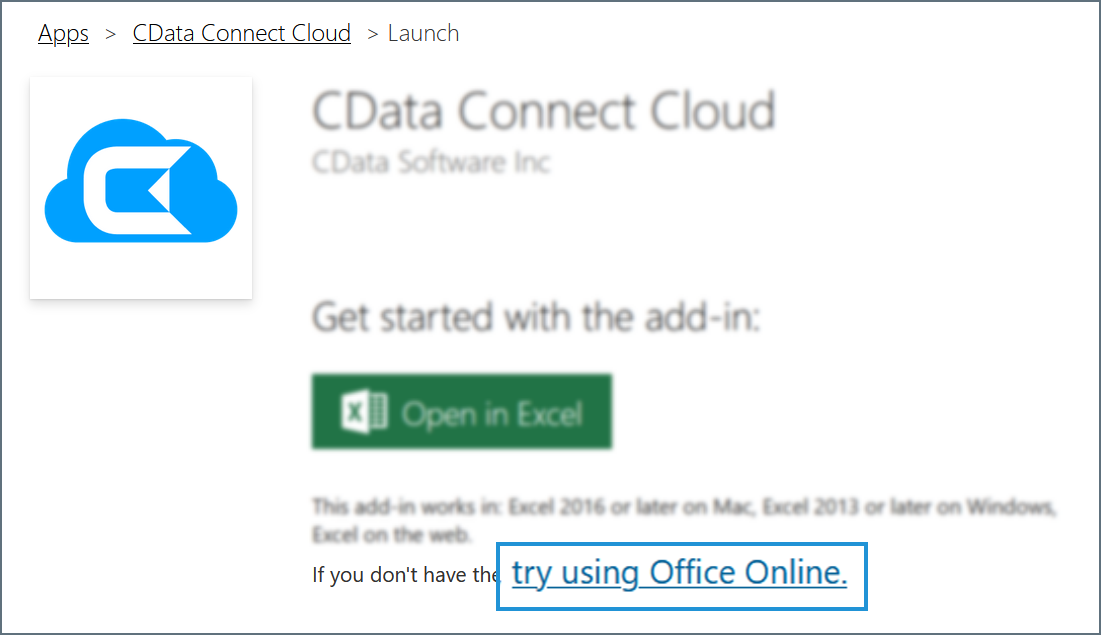
次に、Excel Online で開くをクリックします。
Excel デスクトップ版を使用している場合は、Excel で開くをクリックします。
-
アドインを認証するよう指示がある場合は、認証します。
-
どちらのバージョンのExcel でも、ブックを開くか新しいブックを作成します。
-
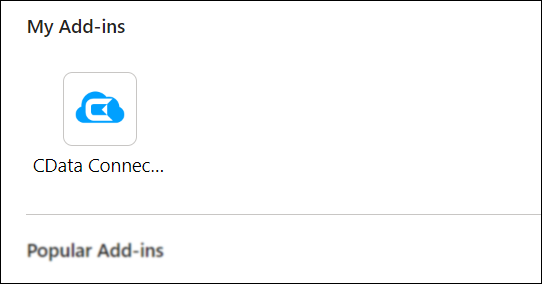
ナビゲーションリボンからホームタブを選択し、アドインをクリックします。個人用アドインウィンドウが開きます。
-
CData Connect Spreadsheets への接続の手順へ続きます。
Microsoft Excel から
-
Microsoft Excel(デスクトップ版またはWeb 版)で新規もしくは既存のブックを開きます。
-
ナビゲーションリボンのファイルタブをクリックします。
-
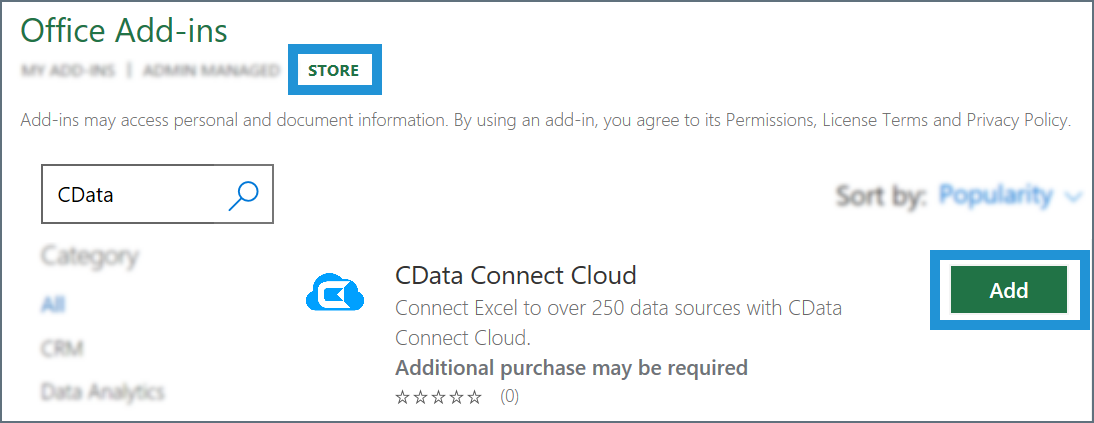
アドインを取得をクリックします。表示されるアドインのリストからすべてをクリックします。
-
ウィンドウでCData を検索します。検索結果でCData Connect Spreadsheets の隣の追加をクリックします。
-
続行をクリックしてライセンス条項に同意します。Excel ブックで認証ダイアログが開きます。
-
Authorize をクリックします。
-
資格情報を入力してダイアログのContinue をクリックします。
-
CData Connect Spreadsheets への接続の手順へ続きます。
CData Connect Spreadsheets への接続
Excel アドインをインストールしたら、以下の手順に従ってCData Connect Spreadsheets アカウントに接続します:
-
Excel のナビゲーションリボンのデータタブを開きCData Connect Spreadsheets をクリックします。
-
CData Connect Spreadsheets アドインを承認します。
Excel ワークブックの右側にCData アドインペインが表示されます。
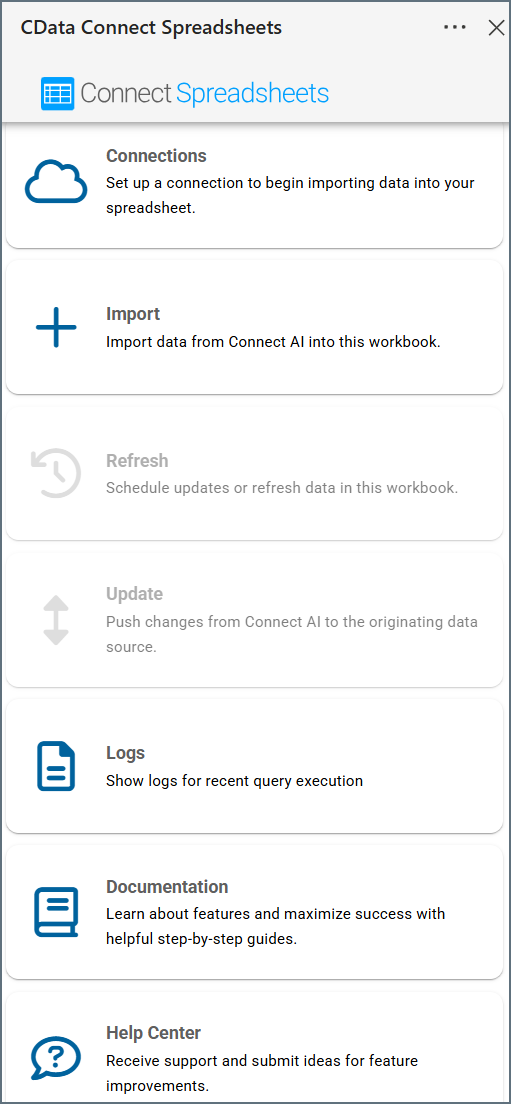
接続の設定
まだCData Connect Spreadsheets に必要なデータを接続していない場合は、設定する必要があります。
-
アドインペインでConnections をクリックします。Add Connectionをクリックします。
-
Excel に接続するデータ用のコネクタを選択します。
-
データ接続文字列を入力します。保存して接続をテストします。
接続に成功したら、データのインポートができます。
データのインポート
CData Connect Spreadsheets からExcel へデータをインポートするには以下の手順に従います:
-
Import をクリックします。
-
ドロップダウンメニューからオプションを1つ選択します:Connections、Workspaces、Derived Views。次に、選択した各オプションの手順に従います。Note:ワークスペースおよびDerived view にアクセスできるのは、Connect AI ユーザーのみです。
Connections のインポート
-
ドロップダウンリストからコネクションを選択します。
-
画面の指示に沿ってクエリを作成する場合はQuery Builder を、クエリを手動で入力する場合はCustom SQL を選択します。
-
Execute をクリックします。
-
プロンプトが表示されたら、現在のスプレッドシートまたは新しいスプレッドシートのいずれかをデータの出力先として選択します。

Workspaces のインポート(Connect AI ユーザーのみ)
-
ドロップダウンリストからワークスペースを選択します。
-
画面の指示に沿ってクエリを作成する場合はQuery Builder を、クエリを手動で入力する場合はCustom SQL を選択します。
-
Execute をクリックします。
-
プロンプトが表示されたら、現在のスプレッドシートまたは新しいスプレッドシートのいずれかをデータの出力先として選択します。
Derived Views のインポート(Connect AI ユーザーのみ)
-
画面の指示に沿ってクエリを作成する場合はQuery Builder を、クエリを手動で入力する場合はCustom SQL を選択します。
-
Execute をクリックします。
-
プロンプトが表示されたら、現在のスプレッドシートまたは新しいスプレッドシートのいずれかをデータの出力先として選択します。
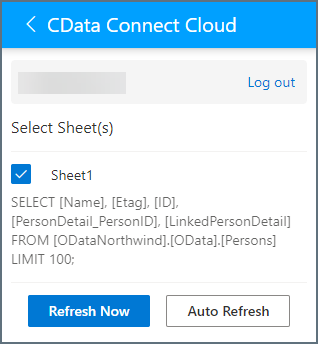
データのリフレッシュ
データがインポートされたら、自動で定期的にリフレッシュされるように設定できます。スプレッドシートのデータを手動でリフレッシュすることも可能です。自動更新は、コミットされていないデータを上書きします。データの読み込みだけであれば自動更新は問題ありません。自動更新を有効化済みでデータを書き込む場合は、更新ボタンを使って変更を頻繁にコミットしてください。
自動更新が正しく機能するには、Excel ブックをブラウザで開いておく必要があります。また、ブックが15分以上アイドル状態の場合、自動更新は実行されません。
-
CData Connect Spreadsheets 画面でRefresh を選択します。
-
リフレッシュするデータシートを選択します。
-
手動でリフレッシュするには、Refresh Now をクリックします。自動更新を設定するには、Auto Refresh をクリックします。
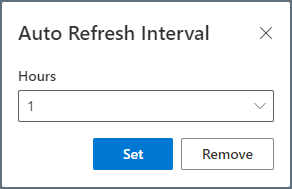
リフレッシュ間隔は時間単位で設定でき、最小間隔は1時間であることに注意してください。自動更新が失敗した場合、Excel Add-In はさらに2回自動更新を試みます。3回失敗すると、その次の自動更新は、次にユーザーが設定した間隔で試行されます。
クエリを選択してRemove をクリックすることで、更新リストからクエリを削除することもできます。
データの更新
Excel スプレッドシートから元のデータソースに変更をプッシュできます。スプレッドシートを更新するには、データに少なくとも1つの主キーが含まれていなければならないことに注意してください。また、ソースデータを更新するための適切な権限が必要です。
自動更新機能を使用している場合は、データを頻繁に更新するようにしてください。そうしないと、変更が上書きされる可能性があります。
Note:CData Connect Spreadsheets はビューの更新をサポートしていません(テーブルのみ)。
スプレッドシートのデータを更新するには、以下の手順に従います:
-
Excel スプレッドシートに変更を加えます。
-
CData Connect Spreadsheets アドインペインでUpdate をクリックします。スプレッドシート全体を更新するか、選択した行のみ更新するかを選択できます。Confirm をクリックします。
ログ
Logs をクリックすると以下の項目を含む直近のクエリが一覧表示されるダイアログが開きます:
- クエリを実行した日時
- クエリ結果(成功 / 失敗)
- クエリの内容とパラメータ
詳しくはLogs を参照してください。
クエリの詳細設定
データをインポートする際、クエリをビルドするためにフィルタ とソート が使用できます。SQL クエリでは、詳細設定オプションのパラメタライズドクエリおよび検索可能なスプレッドシートを使用できます。
フィルタ
フィルタを追加するには、Filters ヘッダーの隣の + をクリックします。+ を再度クリックすることでさらにフィルタを追加することができ、フィルタの横にあるゴミ箱のアイコンをクリックすると、フィルタを削除できます。

各フィルタには以下の3つの入力項目があります:
- Column—フィルタをかけたいカラムをテーブルから選択します。
- Operator—フィルタが実行するオペレーションを選択します。オプション:equals、does not equal、contains、does not contain、less than、less than or equal to、greater than、greater than or equal to
- Value—フィルタ操作の値を表示します。
例えば、AccountValues が$100,000を超えるものを取り出したい場合、Column をAccountValues、Operator をgreater than、そしてValue を100,000 にそれぞれ設定します。この設定をすることでクエリを実行したときにフィルタにマッチした結果のみが返されます。
フィルタのパラメータを入力すると、画面下部のGenerated Query が自動的にアップデートされます。
ソート
クエリ結果にソートルールを追加するには、Sort By ヘッダーの隣の + をクリックします。+ を再度クリックすることでさらにソートルールを追加することができ、ソートルールの横にあるゴミ箱のアイコンをクリックすると、ソートルールを削除できます。
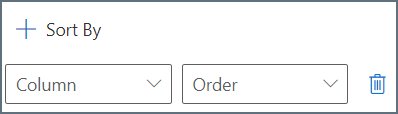
各ソートルールはColumn とOrder(昇順または降順)の選択が必要です。複数のソートルールを追加する場合は、ルールが表示されている順で結果がソートされます。クエリは、最初のルールを最も優先してソートし、次に2番目のルール、といった順番でソートされます。
ソートのパラメータを入力すると、画面下部のGenerated Query が自動的にアップデートされます。
パラメタライズドクエリの記述
カスタムSQL ステートメントでセルを参照することで、動的スプレッドシートを作成できます。Excel アドインは、ステートメントをパラメータ化されたクエリとして実行します。シート内の値を変更すると、Excel アドインは新しいクエリを実行します。
検索可能なスプレッドシートの作成
パラメータ化されたSELECT WHERE クエリを使用して、セルを編集するとデータを動的にフィルタリングするスプレッドシートを作成します。次のフィルタ条件は@InputSheet!A2 パラメータを参照します。これは、シートInputSheet のセルA2 です。@ プレフィックスは、Industry が必須パラメータであることを示します。
SELECT BillingState, Name FROM Account WHERE Industry = @InputSheet!A2