Axios
Axios
This page outlines the steps to connect Axios to your Connect AI account using the REST API.
Prerequisites
Before you connect, you must first do the following:
- Connect a data source to your Connect AI account. See Sources for more information.
- Generate a Personal Access Token (PAT) on the Settings page. Copy this down, as it acts as your password during authentication.
Connect to Connect AI with Axios
-
Create a project directory, for example,
connect_cloud. -
Open the terminal in the project directory and initialize a node project as follows:
npm init -y -
Install the Axios dependency in the project with the following command:
npm install axios -
In your project directory, create a file called
server.jsthat contains the following code. Provide your Connect AIusernameandpat(the PAT you created in the prerequisites). You must also provide aqueryfor your data, such asSELECT * FROM Snowflake1.PUBLIC.Accounts.const axios = require('axios') const user = 'username' const pat = '***********************************'; //Your API endpoint const url = 'https://cloud.cdata.com/api/query'; //Your data to be sent in the POST request const data = { "query":"SELECT * FROM Snowflake1.PUBLIC.Accounts" }; axios.post(url, data, { auth: { username: user, password: pat } }) .then(response => { const rows = response.data.results[0].rows; const schema = response.data.results[0].schema; //Create an array of column names const columnNames = schema.map(col => col.columnName); //Loop through each row and log the column name with its value rows.forEach(row => { const rowObject = {}; row.forEach((value, index) => { const columnName = columnNames[index]; rowObject[columnName] = value; }); console.log(rowObject); }) }) .catch(error => { console.error('Error:', error); }); -
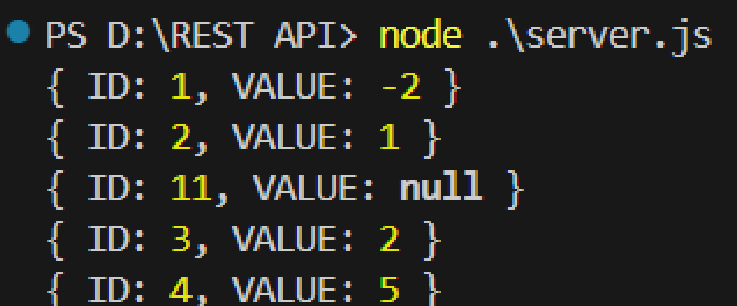
In the terminal, execute the following command to run the server:
node server.jsThe query results appear.