FileMaker Pro
FileMaker Pro
This page outlines the steps to connect FileMaker Pro to Connect AI.
Prerequisites
Before you connect, you must first do the following:
-
Connect a data source to your Connect AI account. See Sources for more information.
-
Generate a Personal Access Token (PAT) on the Settings page. Copy this down, as it acts as your password during authentication.
Connect from Mac
-
Download and install the Actual ODBC Driver for SQL Server.
-
Configure a DSN using the Actual ODBC driver by setting the following:
- URL: https://tds.cdata.com/
- Port: Change the port from 1433 to 14333
- Username: your Connect AI email
- Password: the PAT you created earlier
The FileMaker Pro SQL Query Builder requires customization to connect to Connect AI. Auto-generated queries do not work in FileMaker Pro. We recommend the following additional steps:
-
In the SQL Query Builder SELECT tab, select the columns to include as part of the query.
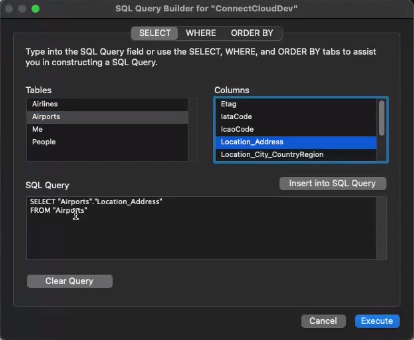
-
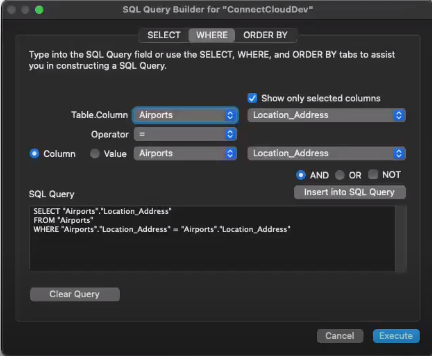
Open the WHERE tab of the SQL Query Builder and select Show only selected columns.
-
In Table.Column, select a table and a column name.
-
Set the Operator to =.
-
Select Column, and then select the same table and column name as Table.Column.
-
Click Insert into SQL Query.
-
If no other modifications to the SQL query are required, click Execute.
Connect from Windows
To establish a connection from FileMaker Pro to Connect AI, follow these steps.
-
Download and install the Connect AI ODBC driver.
- Open the Integrations page of Connect AI.
- Search for ODBC.
- Click Download and select your operating system.
- When the download is complete, run the setup file.
- When the installation is complete, the ConfigureODBC file can be found in the installation directory.
-
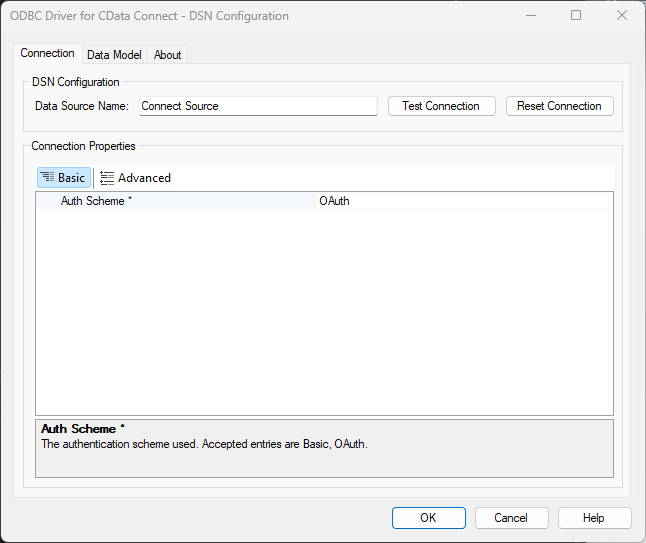
Open the ConfigureODBC file.
-
In the Basic tab, make sure the Auth Scheme is
OAuth. -
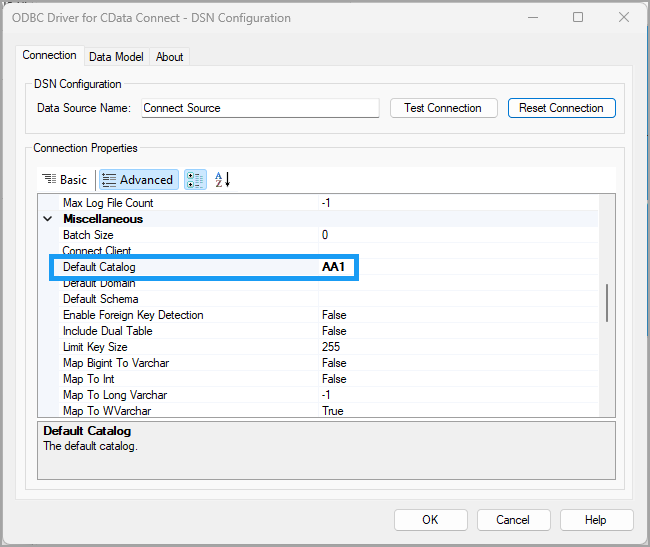
In the Advanced tab, in Miscellaneous > Default Catalog, enter the name of the connection set up in the prerequisites.
-
Click Test Connection. Click OK when you have a successful connection.
-
Launch FileMaker Pro. A startup screen appears.

-
Start a blank app or use a template. Name your app.
-
Select File > Import Records > ODBC Data Source. A Select ODBC Data Source dialog appears.

-
Select Connect Source and click Continue.
-
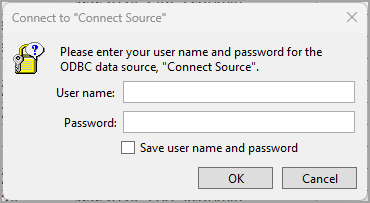
Enter your user credentials in the dialog. The User name is your User Id in Connect AI, and the Password is the PAT obtained in the prerequisites.
-
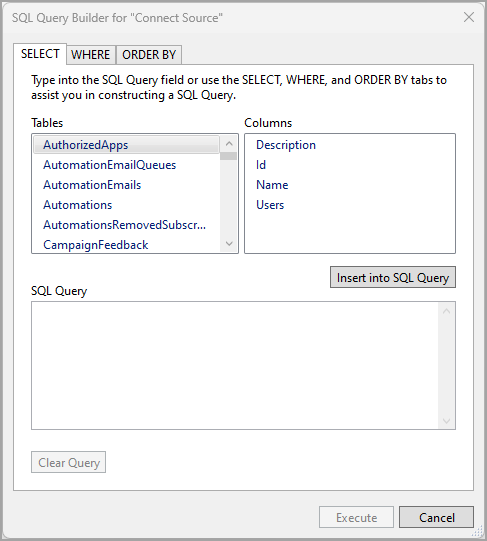
When the Connect AI data is finished importing, a SQL Query Builder dialog appears.
-
Select the tables and columns to insert into your SQL query and click Execute.
-
A Specify Import Order dialog appears, where you can customize how and into which table you want to import the Connect AI data into FileMaker Pro.

-
Click Import to import the data into the target FileMaker Pro file.
-
You can now work with the data in FileMaker Pro.