Tables
Tables
Summary
After connecting to your API, you can create, view, and configure the data from it in the form of tables. Tables can be customized via a wizard or manually to fit various formats and settings. You can also specify server-side filters to improve efficiency. This page covers creating tables and configuring table data, parameters, headers, and filters.
Creating Tables
When creating tables for API Connector, it is important to remember that each table must be created individually in order to be listed in the Connector’s catalog. To do so, follow the steps below:
-
Click Add to begin creating a new table.
-
Enter a Name for the table.
-
In Request URL, choose either
GetorPost. If you selectPost, supply the Body to include in the API request. Then enter theURLof your API endpoint. -
Select
XMLorJSONas the Response Type. -
Enter the URL of your API endpoint into the Request URL field.
Table Data
Next you must tell the connector how to model the API’s response into a table. You can use the wizard to make this easier or directly edit the table data settings.
Configure table data using the wizard
-
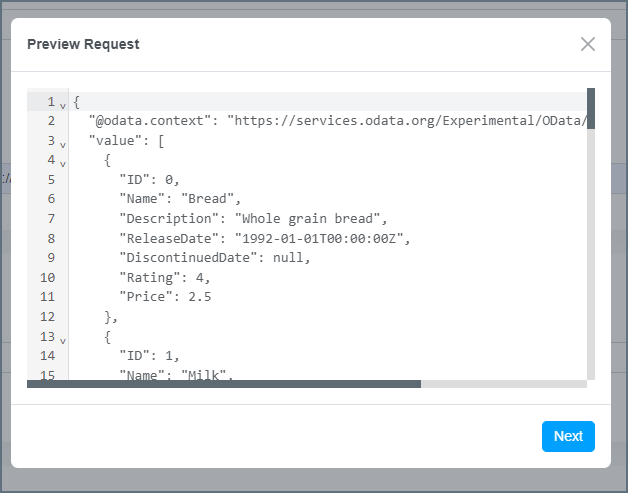
Click Configure in the upper right of the Table Data section to open the configuration wizard. CData Connect calls your API and provides a preview of the data.
-
In the configuration wizard, verify the API response, and click Next.
-
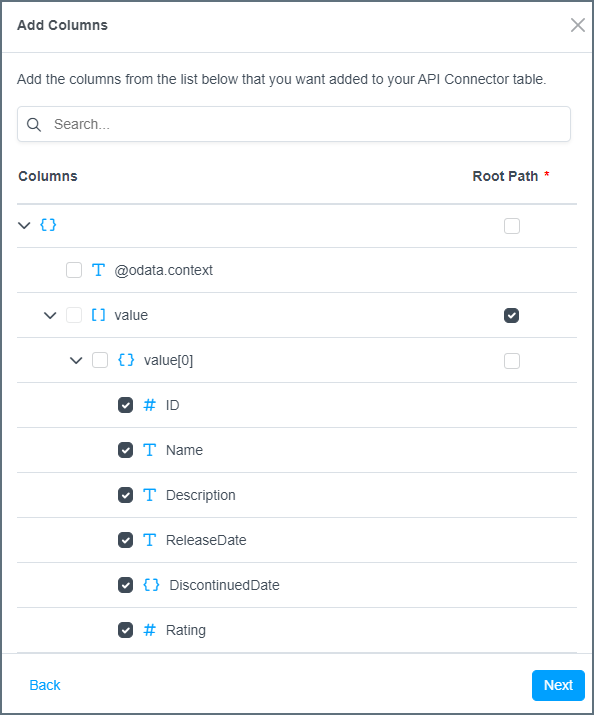
Use the checkboxes on the right to specify the Root Path. This is the path of the element in your API endpoint which contains the repeating items to be used as rows. You can select multiple root paths if there are repeated elements within multiple paths in the response.
-
Use the checkboxes on the left to select the columns to include in your table. Once you have selected your columns, click Next.
-
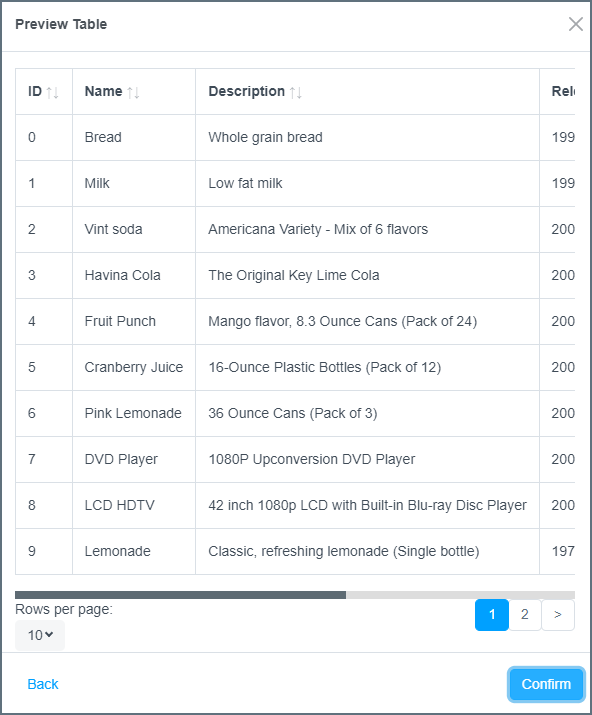
Double check the preview of your table and click Next. The Configuration Wizard automatically imports all selected columns into the correct fields. You can also edit these fields as needed or add new ones manually outside the wizard.
Edit table data
To edit the table data manually instead of using the Configuration Wizard, follow the instructions below.
-
Enter the Root Path. This is the path of the element in your API endpoint which contains the repeating items to be used as rows.
-
(Optional) You can add additional Root Paths if there are repeating sub-elements in your API endpoint. To do so, click Add Root Path and enter the new path in the field that appears.
-
Fill out the column information for each column to include in your table. Each column must include:
-
The Column Name as it appears when accessing data.
-
The Path of the element containing the column value in your API endpoint. This path is relative to the Root Path specified above.
-
the Data Type such as int, boolean, float, etc. that the column contains. The table metadata reflects the data type selected.
-
To add additional columns, click Add Column and repeat the step above.
Parameters
You can add URL parameters to be sent with all API requests for this table. To create a parameter:
-
Enter the parameter Name.
-
Specify the parameter Value.
To add additional parameters, click Add Param and repeat the steps above.
Headers
You can add HTTP headers that are sent with all API requests for this table. These headers are in addition to the headers configured when configuring the API connector itself. To add a new header:
-
Enter the header Name.
-
Specify the Value of the header.
To add additional headers, click Add Header and repeat the steps above.
Filters
After creating the table with columns, you can create filters to define the behavior of the API Connector when a WHERE clause is issued during a query. Filters can improve performance by delegating filtering to the API on the server side. If no filters are included, query options are processed by CData Connect instead.
-
Use the Toggle Switch to activate filters.
-
Select the Column to which column the filter applies to.
-
Select an Operator. Note that HTTP Header-type filters only work with the “Equal” operator.
-
Select a Filter Type from the drop-down menu, either
HTTP HeaderorURL Parameter. -
Specify the Name of the HTTP header or URL parameter that this API uses to filter.
-
Click OK to save the filter. The filter can now be used for SQL queries.
Example
This example shows how to create a filter that processes a query that filters records in the Reports table by the date the record was created.
Here is an example of such a query:
SELECT * FROM Reports Where CreatedDate > 2022-12-31
If no filter has been defined for this table, the connector processes this filter in memory by reading all of the rows from the API and filtering the list in memory by the specified CreatedDate column. However, this API supports this type of filtering on the server side which can improve performance substantially. This is what this query would look like to the API:
https://www.mycustomapi.org/api/reports?$startdate=2022-12-31
In order to tell the connector how to send this filter to the API, you would specify the following fields:
Column: CreatedDate
Operator: Greater Than
Filter Type: Parameter
Parameter Name: startdate
This instructs the connector that when a greater than operator has been specified for the CreatedDate column, include the startDate URL parameter with the filter value in the API request.